Non-Programmer’s Guide to Issue ERC20 Tokens
- 投稿び
In this post, I want to convince you that it’s incredibly easy to issue your own tokens on Ethereum. To this end, I will write a simple token contract in Solidity(one of the programming languages to write smart contracts on Ethereum).
I will briefly explain what a token contract is first, and then demonstrate how to issue tokens. I won’t explain the code much in this post, but you will be able to issue your own token if you follow along.
What Is a Token Contract?#
Tokens could represent monetary value, votes and so on. If you want to issue them, you write smart contracts on the blockchain. The token contract is one of the smart contracts.
Essentially, the token contract is a map of account addresses and their balances. The table below shows the token balance of each address. A token is the unit of this balance.
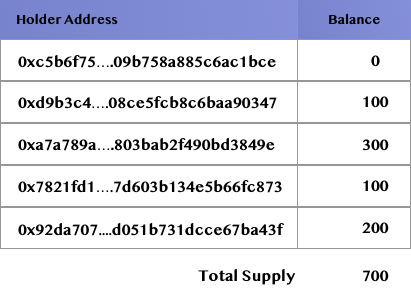
You can move these tokens throught transactions. When tokens are transferred from one address to another, the balance of two accounts in a token contract will be updated(gas is ignored for simplicity here). Let’s say the second address from the top sends 50 tokens to the first one. 50 will be subtracted from the balance of the second address and 50 will be added to that of the first one(see the table below).

Now, most of the tokens you see today follow the ERC20 token contract standards. It is a specific set of functions and events which developers must use in their tokens to make them ERC20 compliant. In the following demo, we will issue ERC20. Don’t worry if you don’t understand what functions or events mean. I just want you to intuitively understand what it’s like to issue them.
Set-up#
We will use mainly two applications to issue and play with tokens:
- Remix:
you write the code and compile it in this web application. - MetaMask:
you communicate with Ethereum network with this browser extension.
There is no installation required for Remix, but you need to install and set-up your MetaMask from here.
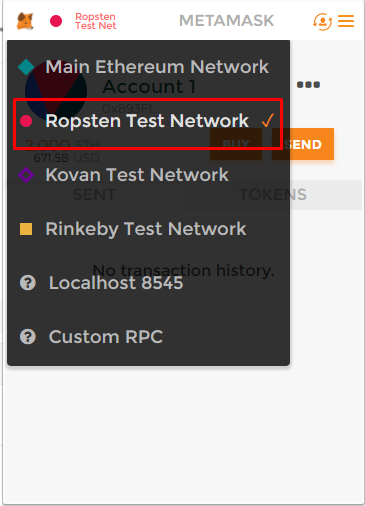
We won’t issue tokens on mainnet. Instead, we will use testnet(Ropsten). This means your tokens won’t have actual value. Make sure you choose the Ropsten network from the dropdown menu in MetaMask.
Now, in order to create your token, you will need to pay some gas. Gas is a commodity like oil. Your car needs oil to run it. Ethereum(EVM) needs gas to run it. You can go to MetaMask Ether Faucet to get some ether for free. On the website, unlock your MataMask and hit the request button(don’t be too greedy!).
I prepared the GitHub repo with an ERC20 token standard code so that you can use it as a boilerplate. You can either clone the repo or just copy and paste the code.
Write The Token Contracts#
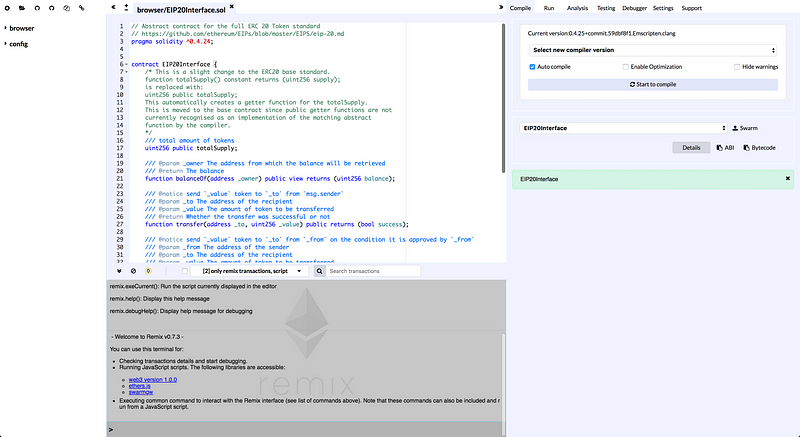
All right then let’s start issuing your own token! There are two smart contract files on GitHub: EIP20Interface.sol(I made some modification to the template by Consensys) and MyToken.sol. We will simply copy these files and paste them in Remix.
First, in Remix, choose the plus icon at the top left:
*If you see the default contract in Remix, you can delete it.
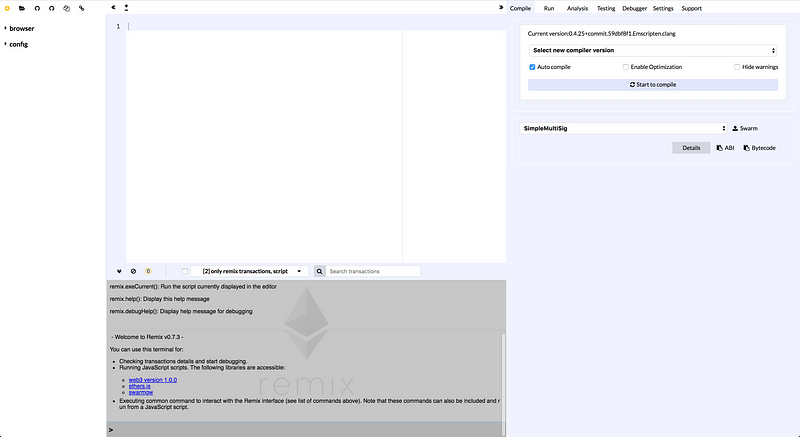 Choose the plus icon at the top left
Name the file(EIP20Interface.sol) and save:
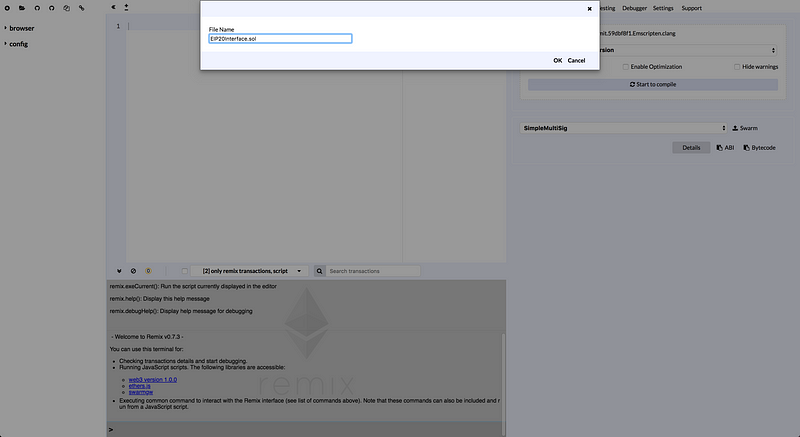 name the contract and hit OK
Copy the code from the GitHub and paste it:
 paste the code you copied from the GitHub
Do the same thing for the MyToken.sol. You can change the name of the MyToken.sol file and the contract name however you want to. I named it MyToken.
Now, let’s take a look at the MyToken contract. It is importing EIP20Interface,which defines the protocol our token will implement and conform to. This line below means that our token has the functionalities in EIP20Interface.
contract MyToken is EIP20Interface
Whenever we create a smart contract, the constructor function below will be executed first.
Copied!constructor (
    uint256 \_initialAmount,
    string \_tokenName,
    uint8 \_decimalUnits,
    string \_tokenSymbol
  ) public {
    balances\[msg.sender\] = \_initialAmount; // Give the creator all initial tokens
    totalSupply = \_initialAmount; // Update total supply
    name = \_tokenName; // Set the name for display purposes
    decimals = \_decimalUnits; // Amount of decimals for display purposes
    symbol = \_tokenSymbol; // Set the symbol for display purposes
}
You need to specify four values below later:
_initialAmount: how many tokens will be in existence
tokenName: a token name
decimalUnits: how many decimals a token has
tokenSymbol: a symbol
The function gives the creator of the contract all of the coins first and then you can deliver tokens from that account.
Now we are ready to deploy!
Deploy The Contracts#
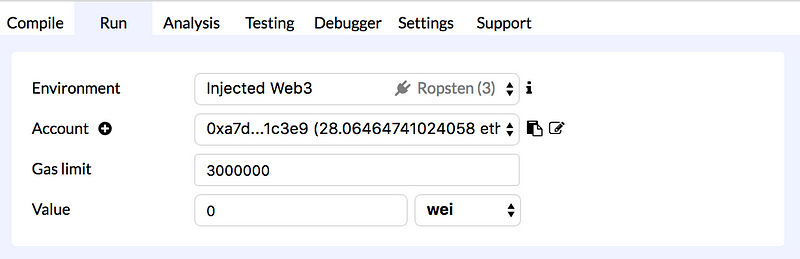
Unlock MetaMask. Again, make sure you choose the testnet(Ropsten).
In the Compile tab, choose the compiler version 0.4.24+commit.e67f0147.Go to the Run tab. Choose the Injected web3 in Environment section. The account should be filled with your address in MetaMask. If not, try choosing another one in the pull-down menu and choose the Injected Web3 again(it’s a bit buggy).
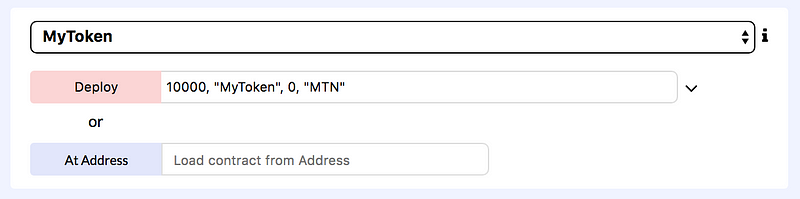
In the next section, choose your token name from the pull down menu first. In the input form, add a value for each variable: _initialAmount, _tokenName, _decimalUnits and _tokenSymbol. Then hit the Deploy button.
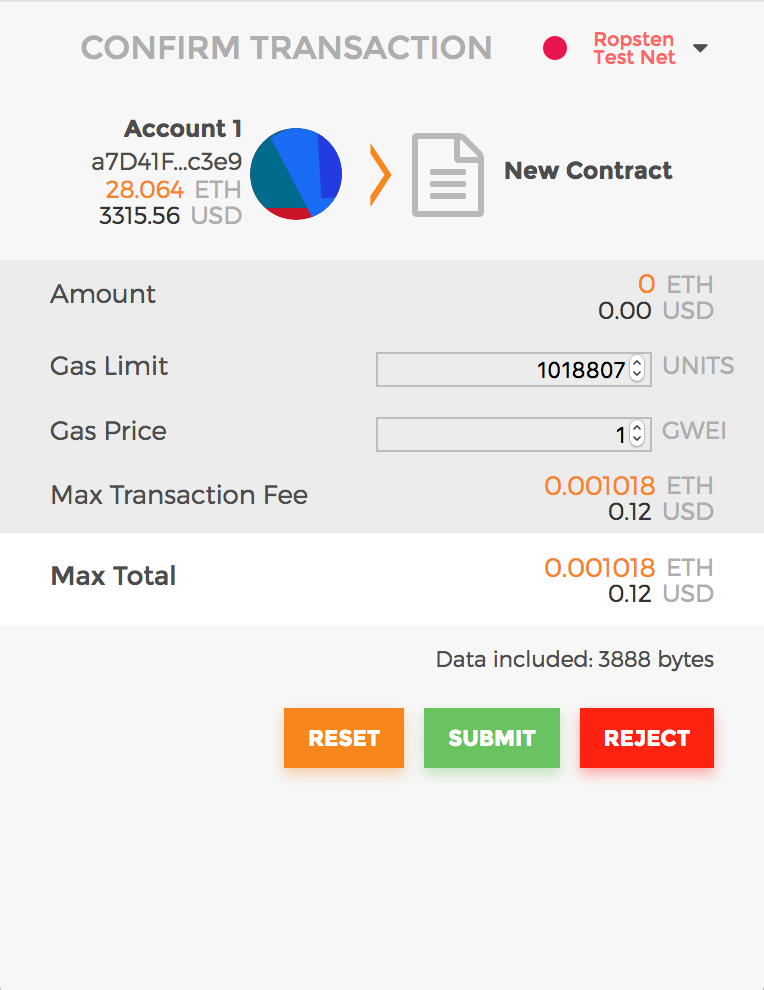
The pop-up window will show up from MetaMask. Hit submit. Then you wait until it gets mined in Ethereum. Once the pending message is gone, your token is created. If it doesn’t go through, pay more gas.
You should be able to see the screen below:
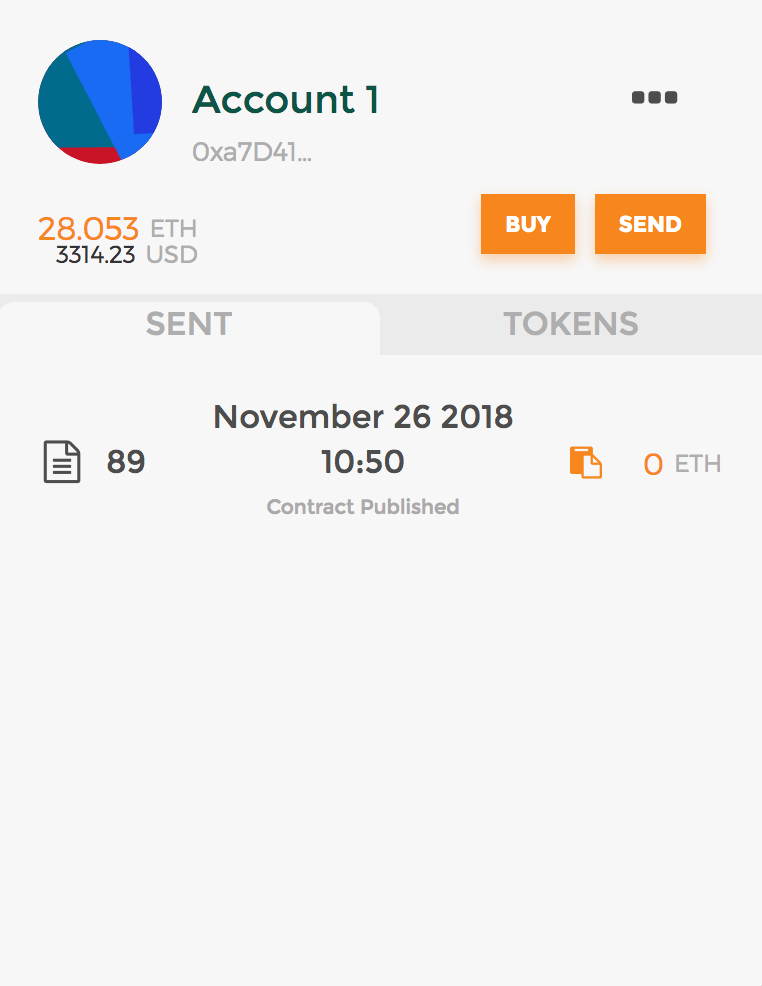
You can see the transaction detail on etherscan if you click on the document icon at the left.
That’s it! Your token is created already.
Interact with The Contract#
Now you can interact with your smart contracts with Remix. At the bottom right corner, you should see the deployed contract:

You can see functions you can use if you click on the arrow icon:
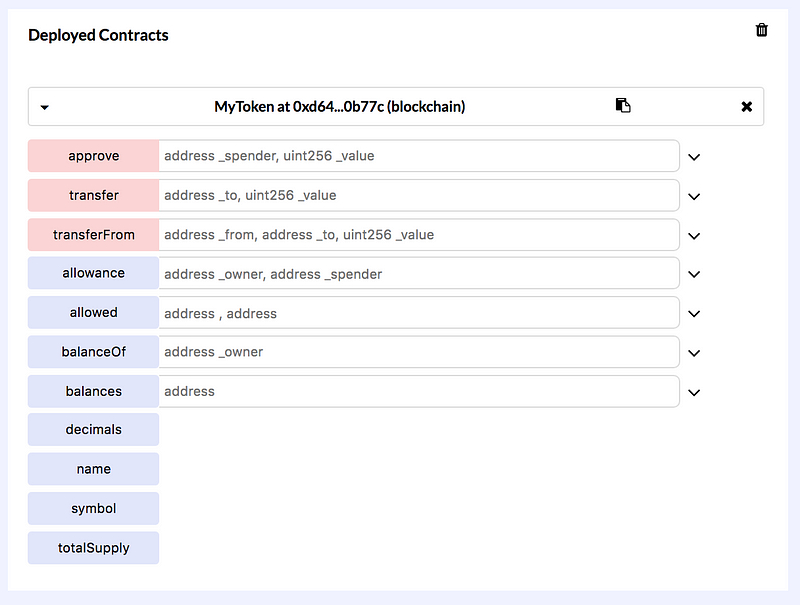
For example, you can check the balance with **_balanceOf_** function. Copy your address to your clipboard from the MetaMask and then paste it to the balanceOf field. Make sure you use a double quote. Click on the balanceOf button. Then you can see the balance of your address, which should be your totalSupply.

You can even transfer some tokens with the **_transfer_** function from here. I will skip the detail because you are going to have to create another wallet for this, but with a wallet that supports Ropsten network such as Tachyon wallet, this can be easily done. You copy the address from another wallet and then paste it to the _to field in a transfer function. Also, specify how many tokens you will transfer in the _value field. There seems to be a bug if you type without pulling down the menu so make sure you pull it down.
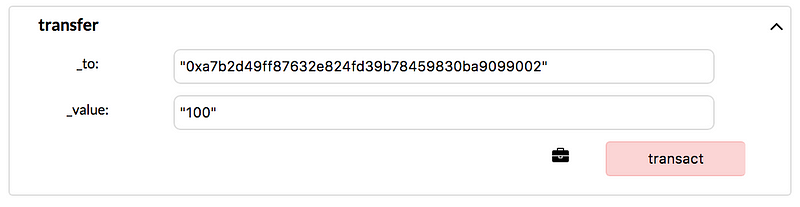
Hit the transact button. Hit the submit button in the MetaMask pop-up screen. Once the pending message is gone, you can check the balance for each address on etherscan. Then you can see 100 tokens are subtracted from your MetaMask account and added to another account.
That’s it!